Interactive Audio UI in Bevy
In this example, we explore how to load an audio file, control it using a simple button, and adjust volume with keyboard input. Here’s how it all plays out.
1. Plugins
use bevy::{
    color::palettes::basic::*, prelude::*
};
These are all the plugins needed for this. We import the core Bevy prelude, which brings in most of the stuff we need. The color palette lets us use some named colors for prettier UI themes.
2. Spawning the Audio
Let’s start off by spawning a basic 2D camera, along with the audio. We also create a MyMusic component and attach it to the audio entity. The MyMusic component will help us identify the entity that’s playing the music. The audio entity contains the AudioPlayer and MyMusic components.
#[derive(Component)]
struct MyMusic;

fn setup(
    mut commands: Commands,
    asset_server: Res<AssetServer>,
) {
    commands.spawn(Camera2d); // UI camera

    commands.spawn((
        AudioPlayer::new(asset_server.load("sillymusic.ogg")),
        MyMusic
    ));
}
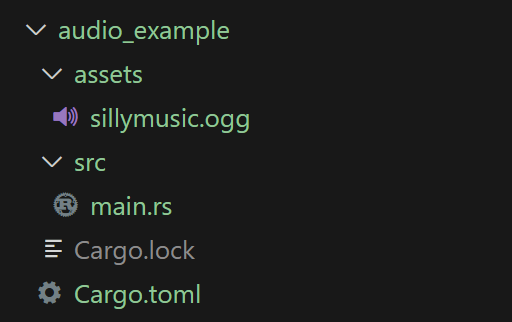
For convenience and organization purposes, we create an assets folder in the package. This is where we will keep our audio files.
Don’t forget to call the setup() function in the main() app.
fn main() {
    App::new()
        .add_plugins(DefaultPlugins)
        .add_systems(Startup, setup)
        .run();
}
If we run the code, we should see a blank camera view and hear the audio playing. If for some reason the audio doesn’t play, try specifying the path of your audio file.
3. Adjusting Volume
It is often useful to adjust the volume of the audio while the program is running, so let’s create a simple function that adjusts volume based on keyboard input. We clamp the volume between 0.0 and 10.0, adjusting it by 1 using the + and - keys.
fn volume(
    keyboard_input: Res<ButtonInput<KeyCode>>,
    music_controller: Query<&AudioSink, With<MyMusic>>,
) {
    match music_controller.get_single() {
        Ok(sink) => {
            if keyboard_input.just_pressed(KeyCode::Equal) {
                if sink.volume() < 10.0 {
                    sink.set_volume(sink.volume() + 1.0);
                }
            } else if keyboard_input.just_pressed(KeyCode::Minus) {
                if sink.volume() > 0.0 {
                    sink.set_volume(sink.volume() - 1.0);
                }
            }
        }
        Err(_) => {} // Do nothing if there's an error
    }

    // Print the current volume to the terminal
    match music_controller.get_single() {
        Ok(sink) => println!("Volume: {}", sink.volume()),
        Err(_) => {}
    }
}
Our function checks for keyboard input and increases or decreases the volume by 1.0 accordingly. It also checks the current volume using sink.volume() before adjusting, so it never exceeds the limits. After handling input, we print the current volume to the terminal.
In the volume() function, sink is a reference to AudioSink, which is the object that gives you control over an audio stream in Bevy. We’re pulling out the AudioSink component from the entity that was tagged with MyMusic. Once we have that sink, we can:
- Query the current volume:
sink.volume() - Change the volume:
sink.set_volume(...) - Pause or resume playback:
sink.toggle()
sink gives us access to the playback state and volume, and we only get access to it because the entity holding it was marked with our MyMusic component earlier in the setup() function.
4. UI Pause Button
Now let’s add a bit of UI into our example. We will create an interactive UI button that will pause or unpause the audio when toggled.
Spawn Button in setup()
Let’s start off by spawning the button in the setup() function. We also create three constants, which are just colors we will use for the button.
const NORMAL_BUTTON: Color = Color::srgb(0.96, 0.94, 0.90); // Milky white color
const HOVERED_BUTTON: Color = Color::srgb(0.96, 0.96, 0.86); // Beige color
const PRESSED_BUTTON: Color = Color::srgb(0.85, 0.80, 0.65); // Darker beige color

fn setup(...) {
    commands.spawn(Camera2d); // UI camera
    commands.spawn((AudioPlayer::new(asset_server.load("sillymusic.ogg")), MyMusic));

    commands
        .spawn(Node {
            width: Val::Percent(100.0),
            height: Val::Percent(100.0),
            align_items: AlignItems::Center,
            justify_content: JustifyContent::Center,
            ..default()
        })
        .with_children(|parent| {
            parent
                .spawn((
                    Button,
                    Node {
                        width: Val::Px(150.0),
                        height: Val::Px(65.0),
                        border: UiRect::all(Val::Px(5.0)),
                        justify_content: JustifyContent::Center,
                        align_items: AlignItems::Center,
                        ..default()
                    },
                    BorderColor(Color::BLACK),
                    BorderRadius::MAX,
                    BackgroundColor(NORMAL_BUTTON),
                ));
        });
}
There is a lot of code, so let’s break it down:
commands
    .spawn(Node { ... })
This creates a full-screen container — kind of like a background panel that covers the whole window. We use this to control the layout and positioning.
width: Val::Percent(100.0)andheight: Val::Percent(100.0)stretch the container across the entire window.align_items: AlignItems::Centerandjustify_content: JustifyContent::Centermake sure anything inside (like our button) will be centered vertically and horizontally.
Then:
.with_children(|parent| {
    parent.spawn((
        Button,
        Node {...},
        BorderColor(Color::BLACK),
        BorderRadius::MAX,
        BackgroundColor(NORMAL_BUTTON),
    ));
});
This is where the actual button gets created:
Buttontells Bevy that this UI element is interactive.Node { width, height, border, ... }sets the size and layout of the button.BorderColor(...)gives the border its color.BorderRadius::MAXmakes the button perfectly round on the edges.BackgroundColor(...)sets the initial color of the button based on the constant we defined earlier.
So in simple terms, we just built a screen-wide UI box, put a button right in the center of it, and gave the button styling so it’s clickable and visually clean.
If we run the code, we should see a beige-colored button in the middle of the screen while the audio is playing. If we click on the button, nothing will happen — and that’s exactly what we’ll work on next.
Clickable Button
Now let’s write the logic for our button. We will create a new function called button_system() that will check for interaction and pause the audio when the button is pressed.
fn button_system(
    mut interaction_query: Query<
        (
            &Interaction,
            &mut BackgroundColor,
            &mut BorderColor,
        ),
        (Changed<Interaction>, With<Button>),
    >,
    music_controller: Query<&AudioSink, With<MyMusic>>, // for audio control
) {
    for (interaction, mut color, mut border_color) in &mut interaction_query {
        match *interaction {
            Interaction::Pressed => {
                *color = PRESSED_BUTTON.into();
                border_color.0 = RED.into();
                pause(&music_controller); // pause the music
            }
            Interaction::Hovered => {
                *color = HOVERED_BUTTON.into();
                border_color.0 = Color::WHITE;
            }
            Interaction::None => {
                *color = NORMAL_BUTTON.into();
                border_color.0 = Color::BLACK;
            }
        }
    }
}
The button_system() function checks for any buttons whose interaction state has changed — whether the mouse just hovered over them, clicked them, or left them alone. It uses a query to find all buttons with changed interactions and then loops through each one.
When the interaction is Pressed, the function sets the button’s background color to the darker pressed tone, changes the border to red to signal it’s being clicked, and then calls the pause() function, which toggles the music on or off.
If the user is simply hovering over the button, the background switches to a lighter color and the border becomes white. If the button isn’t being interacted with at all, it returns to its default color and black border.
fn pause(
    music_controller: &Query<&AudioSink, With<MyMusic>>,
) {
    if let Ok(sink) = music_controller.get_single() {
        sink.toggle();
    }
}
For convenience and organization purposes, pause() is defined as a separate function. All it does is toggle sink, which pauses or unpauses the audio.
Also don’t forget to call button_system() in the main app before running the code. Make sure it runs on Update, as we are constantly checking for button interactions.
.add_systems(Update, button_system)
Let’s run the code and see if it works. We should see the button change color depending on the interaction. The audio should also pause and unpause accordingly.
This was just a simple example, demonstrating how to use Bevy to load audio, build interactive UI, and control playback with input. You can check out the finished code on audio_example.